One hill I will die on is that Matcha should not taste like grass. To prevent this, it comes down to two things: how your fun drink of the day is made and its ingredients. I refuse to pay anywhere between $8 and $14 just to get my daily fix.
The Art of At-Home Matcha Making
Now, I believe I have mastered the art of at-home Matcha making down to a fine art. I’ve been a barista for the best part of a decade, but when it comes to Matcha, most people can tell if it has been made properly just based on the colour. So, save yourself the drama and invest in quality tools that won’t break the bank and secure the best Matcha of your life for a fraction of the price.
Essential Tools for Perfect Matcha
If you are on the hunt for a quality Matcha that doesn’t taste like grass, then you have to start with accumulating the right tools. Think of cutting a tree down with a pencil — you can’t get anywhere without the right tools, and the same goes for making a Matcha.

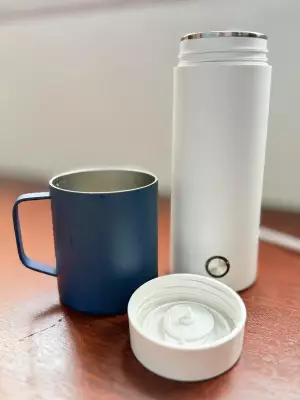
Step right up Koncle. Their eight-piece Matcha Lover kit, with a Handcrafted Bamboo Whisk, Matcha Scoop, Matcha Stand, Matcha Bowl, Sifter, and Tea Cloth completely upgraded my Matcha making skills. In just 10 minutes I was able to create a Brown Sugar Oat Milk Matcha — which if I bought from the store would’ve been upwards of $12.
Step-by-Step Guide
Here’s how I did it. First, soaking my Matcha whisk in boiling water no hotter than 80 degrees, to allow the bamboo to soften at the bristles, thereby preventing them from breaking while whisking. Then I used the Matcha Scoop to pick up approximately one teaspoon of Matcha and placed it into my durable ceramic 16oz matcha bowl. The spouted design allowed for controlled pouring and the sleek glazed interior meant clean-up after my drink was easier than ever, with the material of the bowl being resistant to staining — made from non-toxic, lead-free glaze that keeps tea stains away and ensures safe daily use.
Then using the included Sifter to sift through the clumps in your powder. By sifting your powder, your Matcha will result in a smoother, velvety, and lump-free sip. Once sifted, I grabbed my milk of choice — in this case, you can’t beat Oatly — and then I poured approximately 120mL into the bowl with my sifted Matcha. Here I got my whisk and began whisking in an “M” like motion, without letting my whisk touch the bottom of my Matcha bowl. This creates air pockets within your Matcha and allows for a micro foam to form. The whisk itself is expertly crafted with 100-prong Hyappombari bamboo, creating a rich, stable froth every single time. By whisking with a specified Matcha whisk, your matcha blends more evenly than standard whisking — reducing bitterness and delivering a smooth, creamy texture in every sip.
After whisking for five minutes, place your whisk back into your bowl with the hot water from before to allow the Matcha to fall off the whisk for more sustainable cleaning longevity.
Choosing the Best Matcha Powder
For many non-coffee drinkers, Matcha is the way to go, or if you’re like me and just want to spice up your fun drink of choice, then jump on the Matcha train. My favourite Matcha powder of choice is the Marukyu Koyamaen Matcha straight from Kyoto, and trust me, it will not disappoint. Unlock a whole new level of fun once you know how to create the Matcha of your dreams in the comfort of your own home.
Thanks to Amazon Australia, you can take the first step toward delicious Matcha for just $33.90 today.